Batch Word Document Generation [User Manual]
➤ Introduction:
The professional BatchOffice Word batch generation tool is designed to thoroughly solve the inefficiency of batch generating Word documents using Excel spreadsheets. With this feature, you can easily generate various types of Word documents at unprecedented speed and convenience. With just three simple steps, you can complete batch generation, greatly improving work efficiency and saving time and energy.
➤ Download Sample ➤ Open Generation Tool
➤ Step One (Prepare Excel Data File):
The system will automatically search for the most complete row from the first three rows of Excel file data as the header row (Note: Column names on the header row cannot be empty, please try to avoid using symbols and line breaks).

If you need to insert images into the document, you can use URLs such as: https://www.batchoffice.com/assets/share/img/head_zs.jpg, or you can insert images from the local disk into the Excel file, as shown in the image above (Note: Do not fill in the local disk path of the image, otherwise it will be invalid).
Since Excel files with images may be large, please keep the size of the Excel file within 200MB, otherwise, it may fail to upload.
➤ Step Two (Edit Word Template File):
Create a template for a Word document (in docx format) according to your needs. If you have an existing template file, you can modify it directly. Open the Word template document and mark the content to be filled with "{Field Name}". Supports four types of annotations:
1 Text Filling (Most Common):
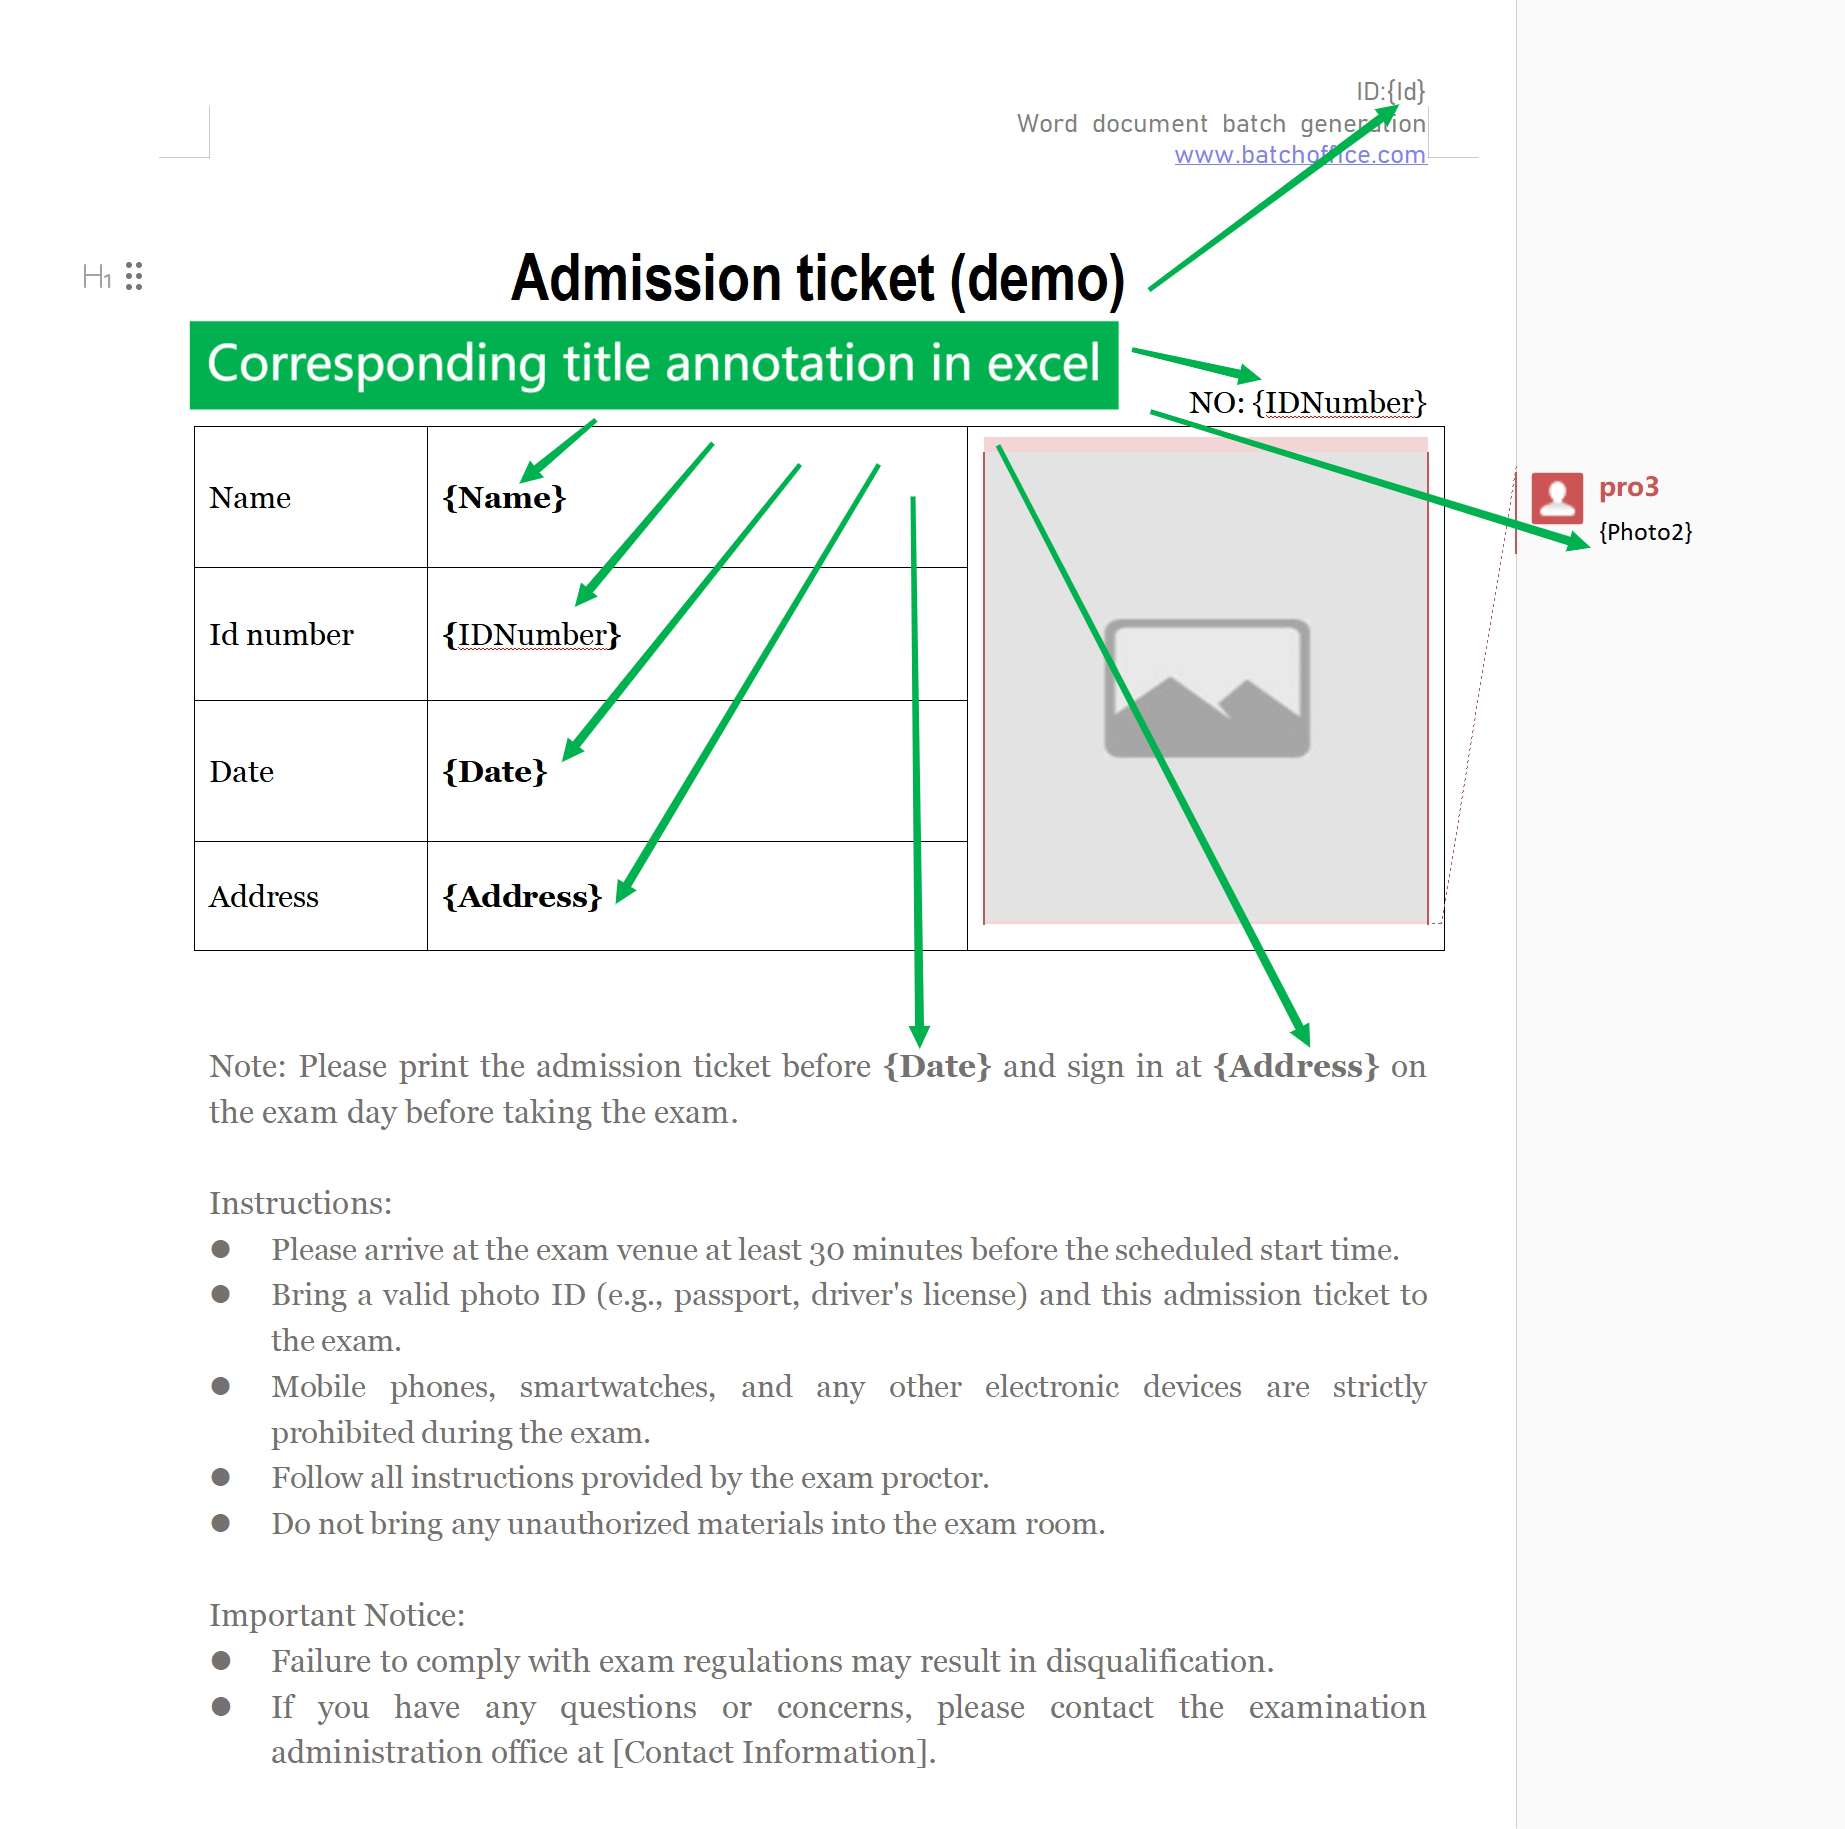
Enclose column names with English half-width braces {} (do not use full-width braces).
The correct format is: {ID}, {Name}, {Exam Date}. Then write comments at the corresponding positions in the document, as shown below:
2 Image Filling:
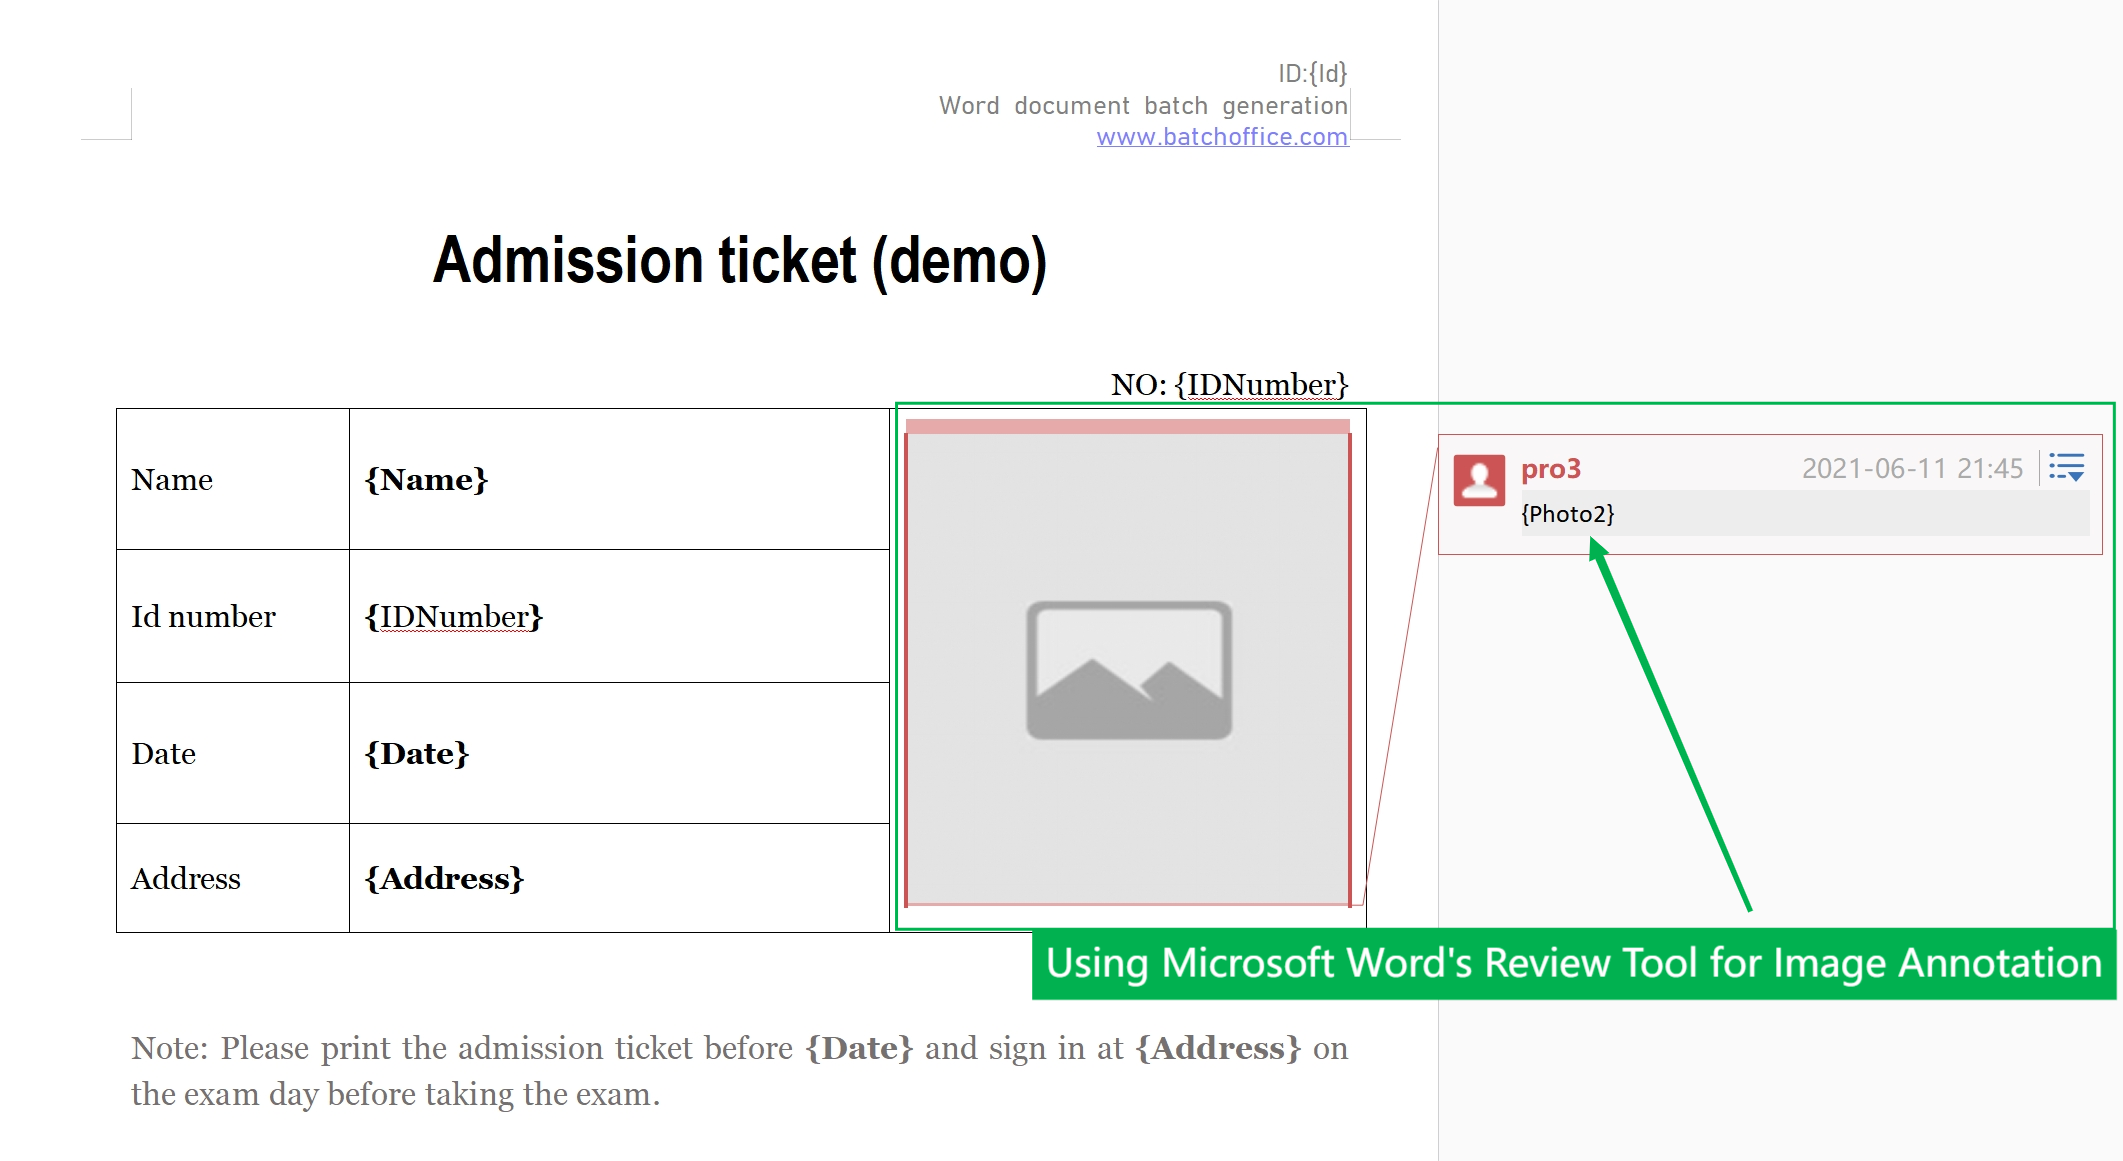
This method is slightly different from text. You need to first create a placeholder image (adjust the position and size), then select the placeholder image, and use the "Insert Comment" feature under the "Review" tool in WORD to fill in the identifier, for example: {Profile Picture}. Make sure to select the image before adding comments, otherwise it may be invalid. See the image below:
3 Filename Filling:
Modify the template file name before uploading, such as: "Admission Ticket Template_{Name}_{ID}.docx", and the generated file will automatically fill in the corresponding file names. (Note: File naming may be restricted by operating system naming rules, so do not include illegal characters in column names, otherwise, generation may fail).
4 Chart Filling:
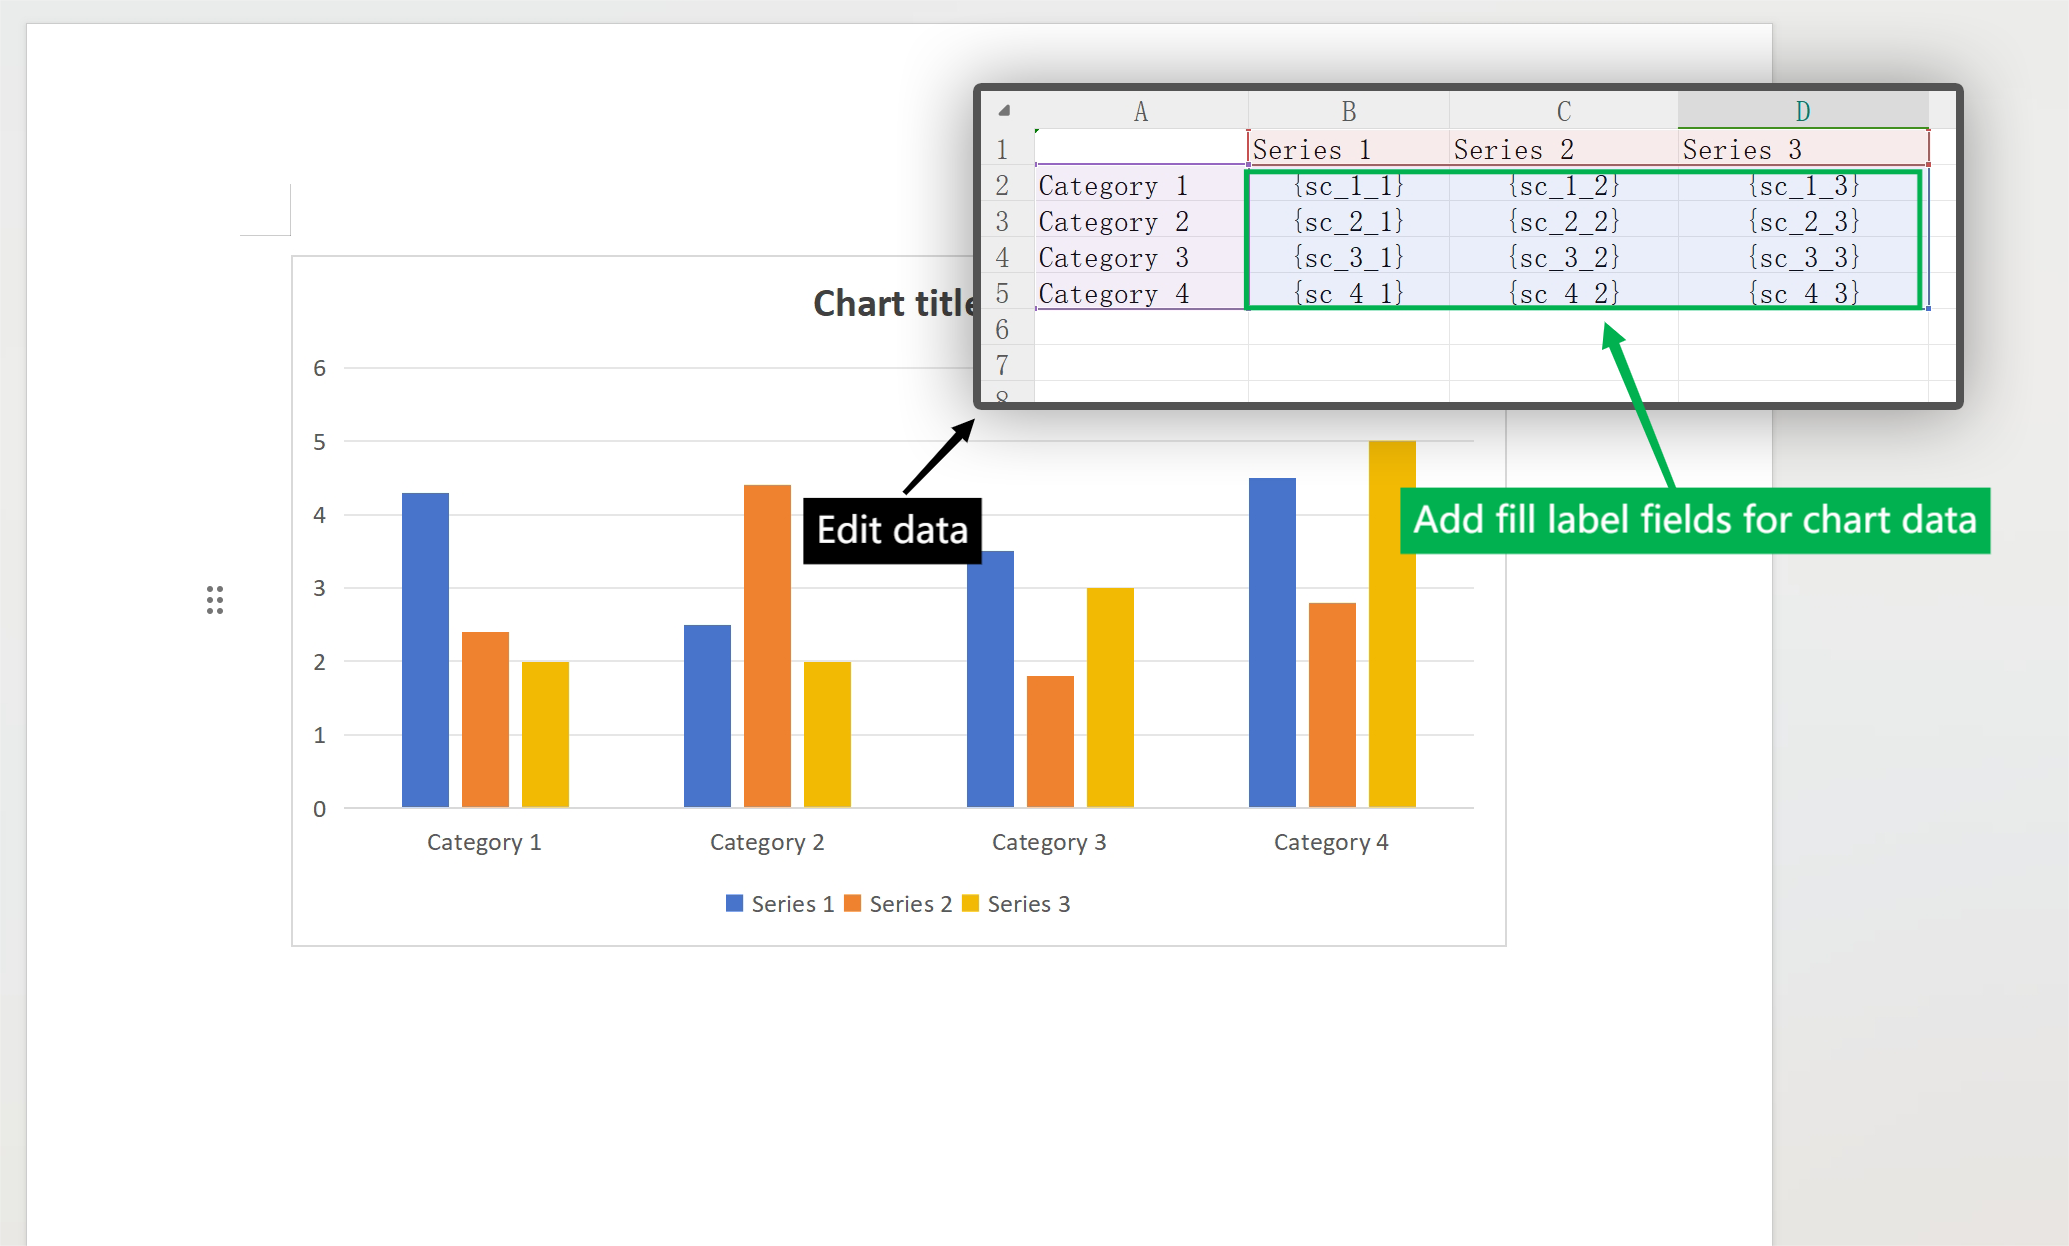
The method for filling in chart data is to first create a chart in the Word template file, then right-click to select edit data, and use {Title} to replace the data value column, as shown below (Note: The data values to be filled in should be numbers or decimals, avoid other characters, otherwise, the plotting may fail, it is recommended to use WPS):
➤ Step Three (Use BatchOffice Batch Generation):
Open "BatchOffice - Word Document Batch Generation", and add Excel data files and Word template files. You can use the preview button to view the effect of the template generation. If there are any issues, adjust and re-add. If there are no issues, you can generate directly. The final generated effect is as follows:


➤Other Notes:
1. The free version generated by BatchOffice only has three for preview. (For templates such as certificates that occupy the entire page, header misalignment may occur during preview, but not in the formal version).
2. Please keep the number of rows in Excel within 2000 to avoid abnormal problems caused by excessive data volume.
3. The size of the uploaded file should be kept within 200MB, otherwise, it may fail to upload.
4. Before downloading the formal version, please use the template preview and download preview functions to confirm the correctness of the generated content.
5. Our service is continuously improving. If you encounter any problems during use, please provide feedback directly to us.
